

GET A QUOTE
How Do You Adjust a Cervical Collar?
Cervical collars are vital medical devices used to support the neck and prevent further injury in cases of trauma, surgery, or chronic conditions. Understanding how to adjust a cervical collar correctly is crucial for patient comfort and recovery. This comprehensive guide will walk you through the steps to adjust a cervical collar properly, ensuring optimal support and alignment.
Why Proper Adjustment is Essential
The Role of Cervical Collars
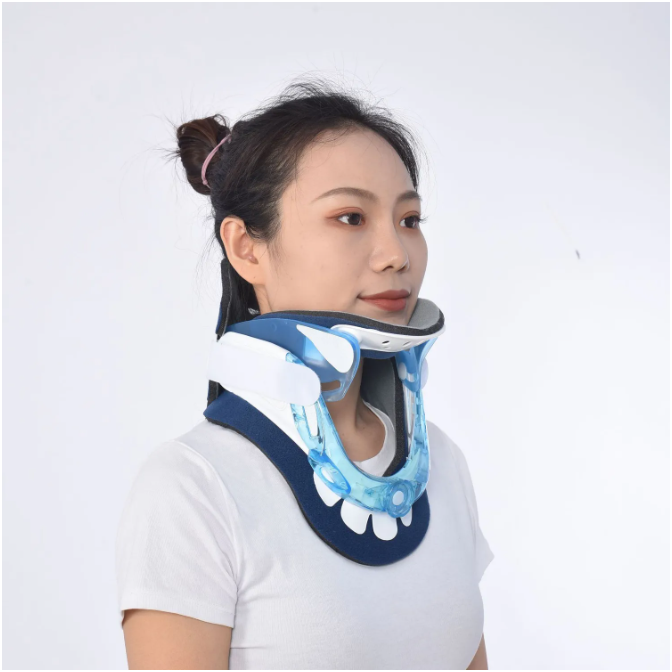
Cervical collars, also known as neck braces, play a critical role in immobilizing the cervical spine. They help to stabilize the neck and reduce movement, which can prevent further injury and aid in the healing process. Improper adjustment can lead to discomfort, impaired healing, and even additional injuries.
Common Uses for Cervical Collars
Cervical collars are used in various medical situations, including:
- Post-surgery recovery
- Traumatic injuries such as whiplash
- Chronic conditions like cervical spondylosis
- Preventing further injury in emergency settings
How Do You Adjust a Cervical Collar?
Adjusting a cervical collar involves several steps, ensuring the collar fits snugly yet comfortably. Below, we break down the process into easy-to-follow instructions.
Step 1: Gather Necessary Materials
Before you start, make sure you have the following materials:
- A properly sized cervical collar
- Soft padding (if needed)
- Mirror (optional, for self-adjustment)
Step 2: Position the Patient
If you are adjusting the collar for someone else, have the patient sit or lie down in a neutral position. Their head should be aligned with the spine, and their eyes should be looking straight ahead. If the patient is adjusting the collar themselves, they should stand in front of a mirror to ensure proper alignment.
Step 3: Prepare the Collar
Open the cervical collar and inspect it for any damage or wear. Ensure all velcro straps or fasteners are in good condition. If the collar has removable padding, make sure it is clean and properly positioned.
Step 4: Fit the Back Panel
Place the back panel of the cervical collar against the back of the patient's neck. The bottom of the collar should rest comfortably at the base of the neck, while the top should support the lower part of the skull. Ensure the panel is centered and aligns with the spine.
Step 5: Secure the Front Panel
Bring the front panel of the collar around to the front of the neck. The chin should rest comfortably on the chin rest, and the sides should align with the jawline. Secure the velcro straps or fasteners, ensuring the collar is snug but not too tight. The patient should be able to breathe and swallow comfortably.
Step 6: Check the Fit
Once the collar is secured, check the fit. The collar should immobilize the neck without causing discomfort. Ensure there is no excessive pressure on the throat or jaw. Adjust the straps as needed to achieve a balanced fit.
Step 7: Monitor and Readjust
Monitor the patient regularly to ensure the collar remains in the correct position. Readjust as necessary, especially if the patient experiences any discomfort or if the collar shifts out of place.
Tips for Maintaining Comfort and Hygiene

Regular Cleaning
To maintain hygiene, clean the collar regularly according to the manufacturer's instructions. Removable padding can usually be hand-washed with mild soap and water. Allow it to air dry completely before reattaching.
Skin Care
Check the skin under the collar daily for any signs of irritation or pressure sores. Keep the skin clean and dry, and apply a barrier cream if necessary to prevent chafing.
Padding Adjustments
If the collar feels too tight or causes discomfort, consider adding or adjusting the padding. Ensure the padding provides cushioning without compromising the fit or support of the collar.
Conclusion
Knowing how to adjust a cervical collar is essential for anyone who needs to use this device for neck support. By following the steps outlined in this guide, you can ensure a proper fit, enhancing comfort and promoting healing. Always prioritize the patient’s well-being, and don't hesitate to seek professional advice if you encounter any issues.
For high-quality emergency first aid supplies, including cervical collars, consider RisenMedical. As a premier manufacturer of emergency and first aid kits, RisenMedical offers reliable and durable products designed to support patient care in critical situations. Trust RisenMedical to provide the tools you need to ensure safety and effective treatment in any emergency. Visit RisenMedical to learn more about our comprehensive range of products and how we can support your medical needs.
FAQs about Cervical Collar
How Tight Should a Cervical Collar Be?
A cervical collar should be snug enough to immobilize the neck but not so tight that it restricts breathing or causes pain. You should be able to fit one or two fingers between the collar and the neck.
Can You Adjust a Cervical Collar Yourself?
Yes, you can adjust a cervical collar yourself, but it's important to do so carefully. Use a mirror to ensure proper alignment, and follow the steps outlined above to achieve a correct fit. If possible, seek assistance from a healthcare professional for the initial fitting.
How Often Should You Check the Fit?
Regularly check the fit of the cervical collar, especially if the patient experiences discomfort or if the collar shifts. Ideally, check the fit several times a day to ensure it remains properly adjusted.
What Should You Do if the Collar Causes Pain?
If the cervical collar causes pain or discomfort, it may be improperly adjusted. Try readjusting the fit or adding padding. If the discomfort persists, consult a healthcare professional to ensure the collar is the correct size and type for the patient’s condition.